
Let’s build a complaint data pipeline, one step at a time
Imagine you have a list of complaints about things like broken streetlights or damaged roads. You want to answer a few questions: Which complaints are still open? How old are they? Has a complaint’s status changed since we last checked?
The API gives us the starting data. Our job is to collect a small sample, tidy it up, and make tables we can ask questions about with SQL.
We’ll walk through the whole project together: API → Cloud Storage → BigQuery SQL → Iceberg tables → Cloud Composer. You’ll create the cloud resources and run the commands yourself. First we’ll do each step by hand. Once it works, we’ll let Composer run the steps in order.
You can follow along with the code in the GitHub repository: mesodiar/iceberg-pipeline. It includes the Python scripts, BigQuery SQL, example settings and Airflow DAG we’ll use throughout this post. Keep the repository open beside the tutorial so you can read each file as we reach it.
Our Pipeline
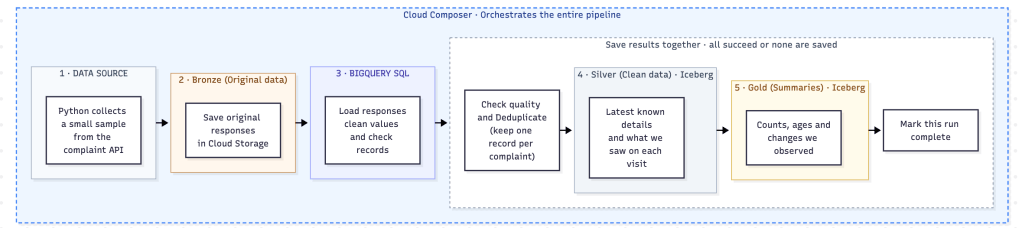
Read it from left to right. The colored sections show different kinds of work, not different Google Cloud locations. Orchestrates means “runs the steps in the right order.” Composer surrounds the pipeline because it coordinates the whole process.
Bronze, Silver and Gold are just names for how ready the data is. Bronze keeps the original, Silver makes it useful, and Gold answers questions. Iceberg is the table format we use for Silver and Gold. BigQuery manages those tables’ files in Cloud Storage; we query and update them with SQL.
One thing to remember throughout: we’re collecting a sample. Our numbers describe the complaints we collected, not every complaint in Bangkok.
1. Get your laptop and project ready
You’ll need this repository on your computer, Python 3.11 or newer, the Google Cloud CLI (gcloud and bq), and a Google Cloud project with billing enabled. Your account needs permission to create the resources below. If someone manages the project for you, share the access requirements with them.
Open a terminal in the repository’s main folder. All terminal commands in this guide run there. Keep using the same terminal so the settings we save with export stay available. When you see a command split across lines, copy the whole block, including each \.
python3.11 -m venv .venvsource .venv/bin/activatepip install -e '.[gcp,dev]'gcloud auth logingcloud auth application-default login
The first three lines prepare Python. The two logins serve different tools: gcloud uses the first, and our Python scripts use the second. Use the same intended Google account for both.
Now set your local names. Replace project_name below with your project ID, not its display name. Shared examples in this repository keep the placeholder.
export TUTORIAL_PROJECT="project_name"export TUTORIAL_REGION="asia-southeast1"export TUTORIAL_RAW_BUCKET="${TUTORIAL_PROJECT}-raw"export TUTORIAL_WAREHOUSE_BUCKET="${TUTORIAL_PROJECT}-warehouse"export TUTORIAL_RUN_ID="friendly-001"export TUTORIAL_PROCESSING_ID="friendly-001-attempt-1"gcloud config set project "$TUTORIAL_PROJECT"
Think of run_id as the label on one collection of API responses. processing_id labels one attempt to process that collection. We’ll keep both unchanged through this first run. If you already used friendly-001, choose a new label before collecting again.
Create your private settings file if it doesn’t exist yet:
python - <<'PY'from pathlib import Pathtarget = Path("config/local.json")if not target.exists(): target.write_bytes(Path("config/example.json").read_bytes())print("Open", target, "and check your settings.")PY
Open config/local.json. Update these entries to match the variables you just set; leave the other entries in the file:
{ "project_name": "project_name", "region": "asia-southeast1", "bronze_root": "gs://project_name-raw/bronze/traffy", "warehouse_root": "gs://project_name-warehouse", "max_records": 300}
This is a partial example, not a replacement for the whole config. Keep the default dataset names staging, silver, gold, ops and connection name lakehouse_connection for this guide. Setting max_records to 300 keeps the later Composer run small too; the teaching extractor always requests at most 300 records.
Quick check: your terminal variables and config point to the same project, region and buckets. config/local.json is ignored by Git.
2. Make places to store the data
A bucket holds files. A BigQuery dataset groups tables, a little like a folder. We’ll create two buckets and four datasets. Use the same region for all of them.
First, enable the services:
gcloud services enable \ storage.googleapis.com bigquery.googleapis.com bigqueryconnection.googleapis.com \ composer.googleapis.com iam.googleapis.com
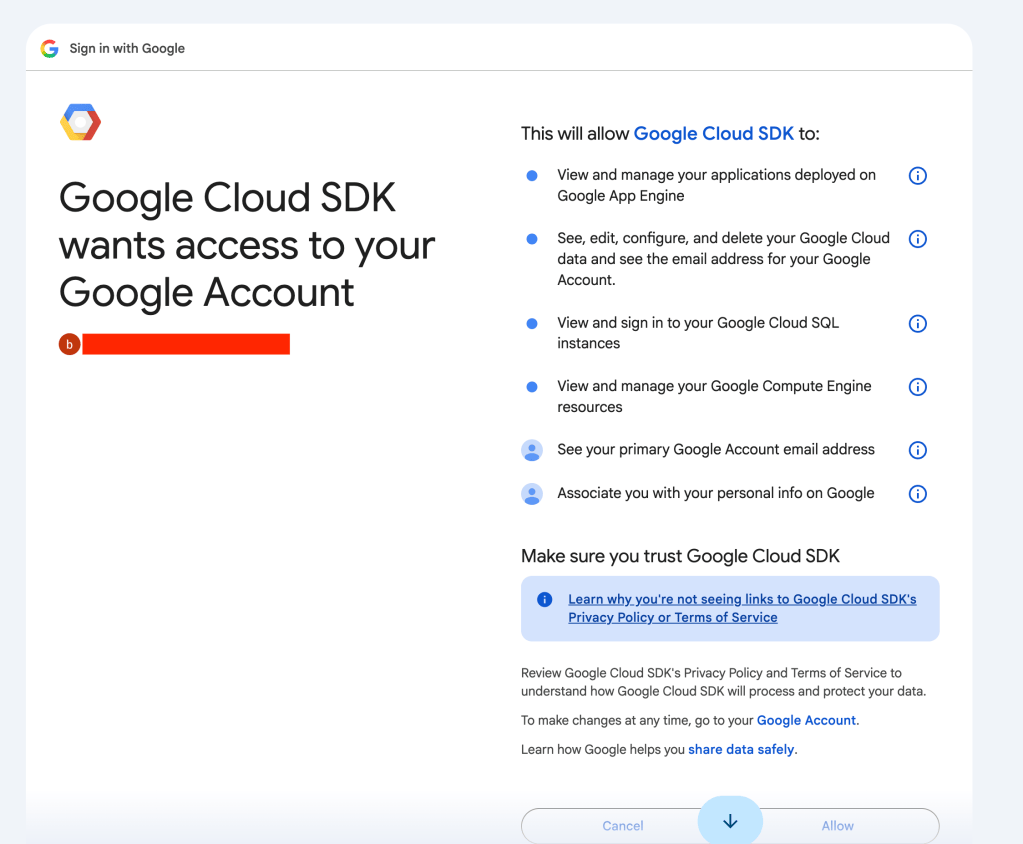
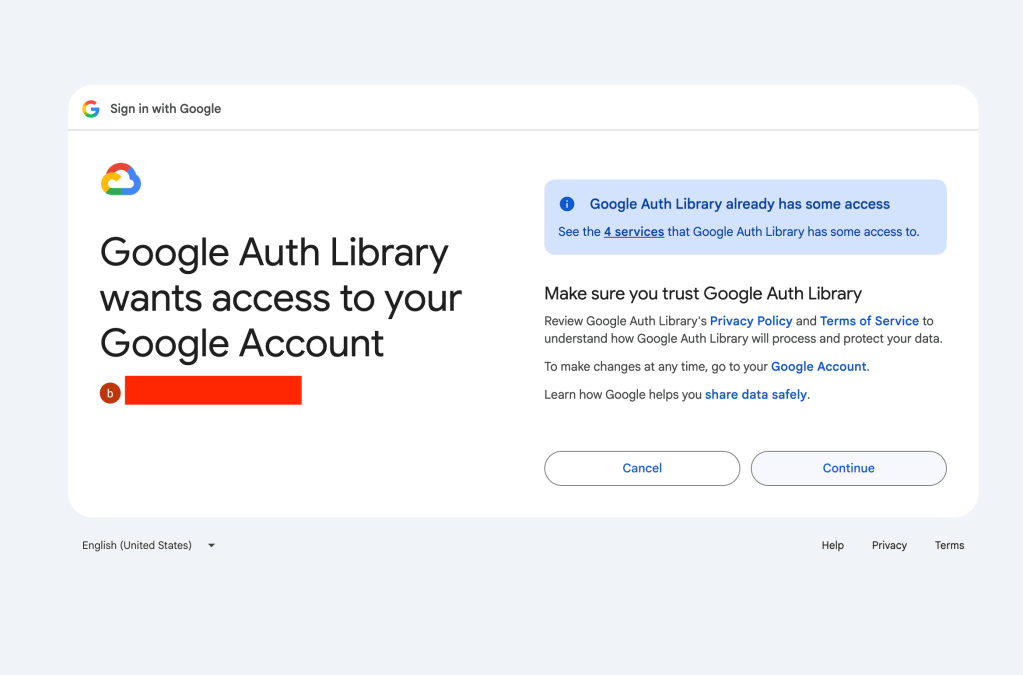
Then create the buckets and datasets. If you already made them, check their region and reuse them. Bucket names are shared globally, so choose another name if yours is taken, and update both your terminal variables and local config.
gcloud storage buckets create "gs://${TUTORIAL_RAW_BUCKET}" \ --location="$TUTORIAL_REGION" --uniform-bucket-level-accessgcloud storage buckets create "gs://${TUTORIAL_WAREHOUSE_BUCKET}" \ --location="$TUTORIAL_REGION" --uniform-bucket-level-accessfor dataset in staging silver gold ops; do bq --project_id="$TUTORIAL_PROJECT" --location="$TUTORIAL_REGION" \ mk --dataset "${TUTORIAL_PROJECT}:${dataset}"done
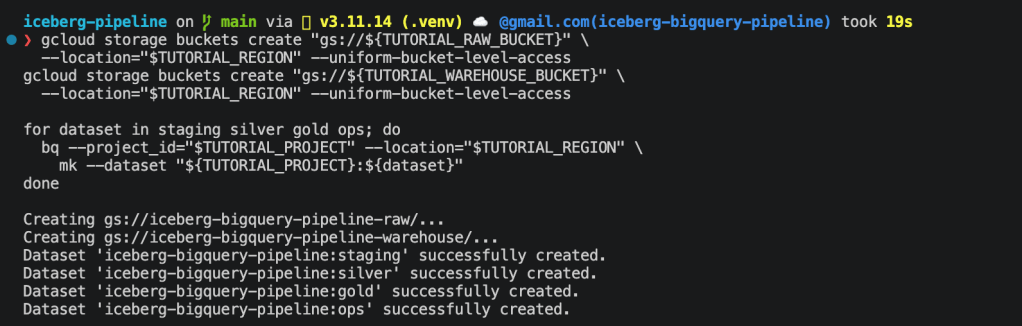
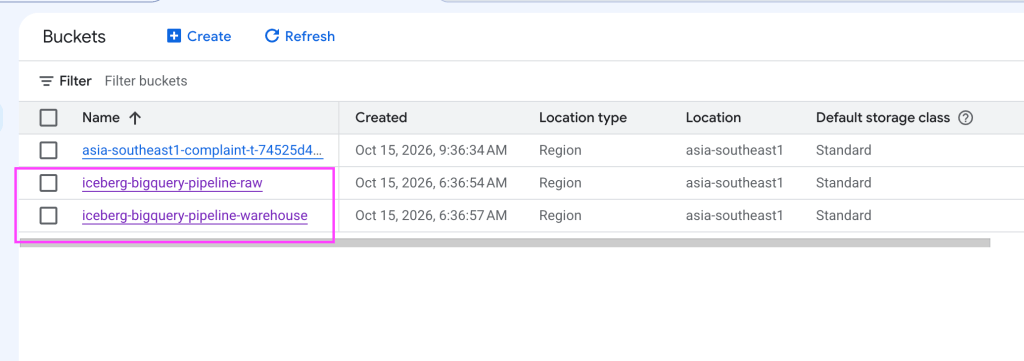
Here’s what each place is for:
| Place | What we’ll put there |
|---|---|
| Raw bucket | Original API responses and files ready to load |
| Warehouse bucket | Iceberg files managed by BigQuery |
staging dataset | Responses and records we’re checking |
silver dataset | Clean complaint details and observations |
gold dataset | Counts, age groups and observed changes |
ops dataset | A record of which runs finished successfully |
Give BigQuery access to the warehouse bucket
BigQuery needs a connection to manage the Iceberg files. Creating that connection gives it a service account: an identity a program uses instead of a person’s login.
bq --project_id="$TUTORIAL_PROJECT" --location="$TUTORIAL_REGION" \ mk --connection --connection_type=CLOUD_RESOURCE lakehouse_connectionbq --project_id="$TUTORIAL_PROJECT" --location="$TUTORIAL_REGION" \ show --connection --format=prettyjson \ "${TUTORIAL_PROJECT}.${TUTORIAL_REGION}.lakehouse_connection"
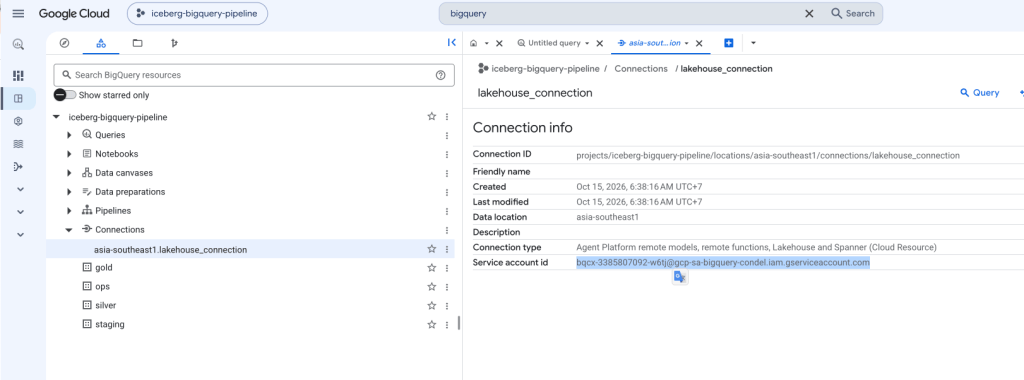
Find cloudResource.serviceAccountId in the output. Copy that address into the variable below, then give it access to the warehouse bucket:
export TUTORIAL_CONNECTION_SA="CONNECTION_SERVICE_ACCOUNT_FROM_OUTPUT"gcloud storage buckets add-iam-policy-binding "gs://${TUTORIAL_WAREHOUSE_BUCKET}" \ --member="serviceAccount:${TUTORIAL_CONNECTION_SA}" --role=roles/storage.objectUsergcloud storage buckets add-iam-policy-binding "gs://${TUTORIAL_WAREHOUSE_BUCKET}" \ --member="serviceAccount:${TUTORIAL_CONNECTION_SA}" --role=roles/storage.legacyBucketReader
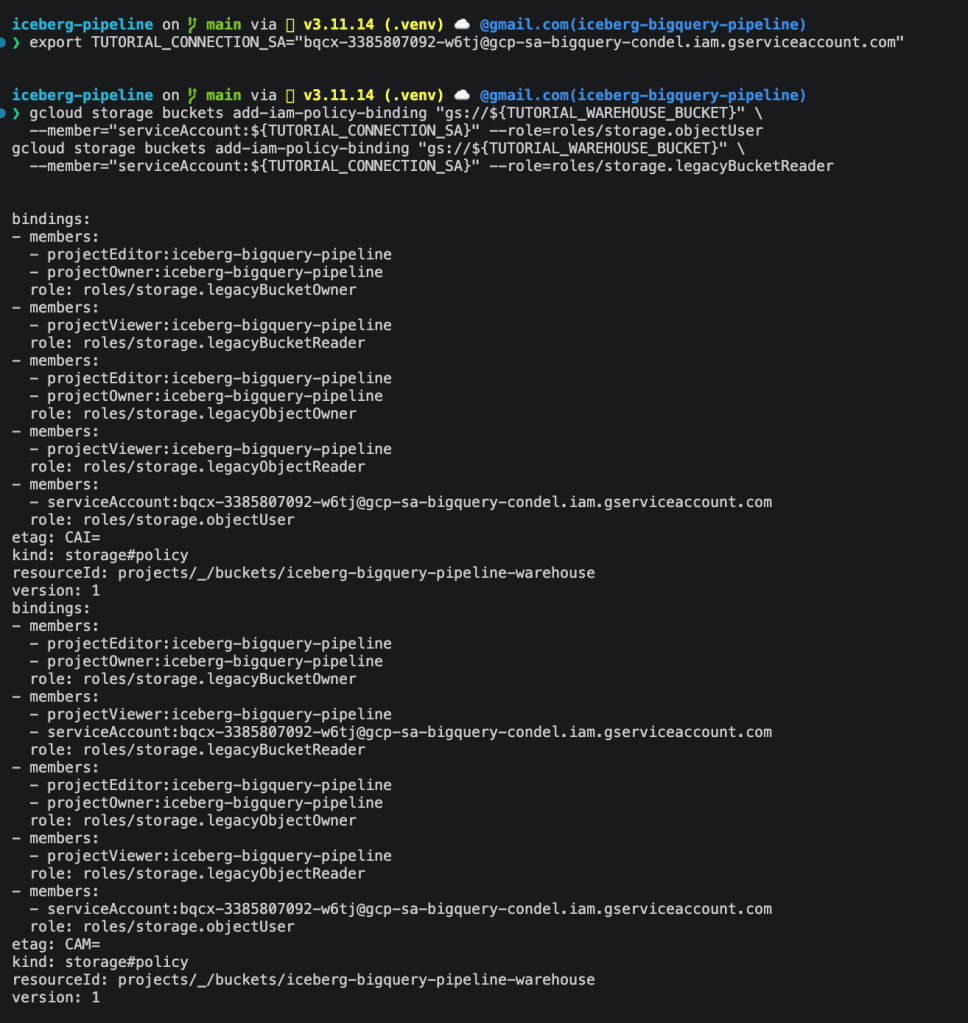
There are three identities to keep straight: you run the manual lesson, the connection account manages Iceberg files, and the Composer account will run the pipeline later. Giving one access doesn’t automatically give the others access.
Your own account needs BigQuery Job User on the project, read/write access to the four datasets, raw-bucket access, and permission to create tables using the connection (bigquery.connections.delegate, included in Connection Admin). The setup reference lists the permissions by task.
Quick check: you can see two buckets, four datasets and one connection in Google Cloud.
3. Create the tables, including Iceberg
Let’s look at the SQL before running it. Open the table definitions. The file creates regular BigQuery tables for temporary work and Iceberg tables for the clean results and summaries.
These are the parts of an Iceberg table definition to notice:
-- An excerpt to read, not a complete command to run.WITH CONNECTION `project_name.asia-southeast1.lakehouse_connection`OPTIONS ( file_format = 'PARQUET', table_format = 'ICEBERG', storage_uri = 'gs://project_name-warehouse/silver/complaints_current/');
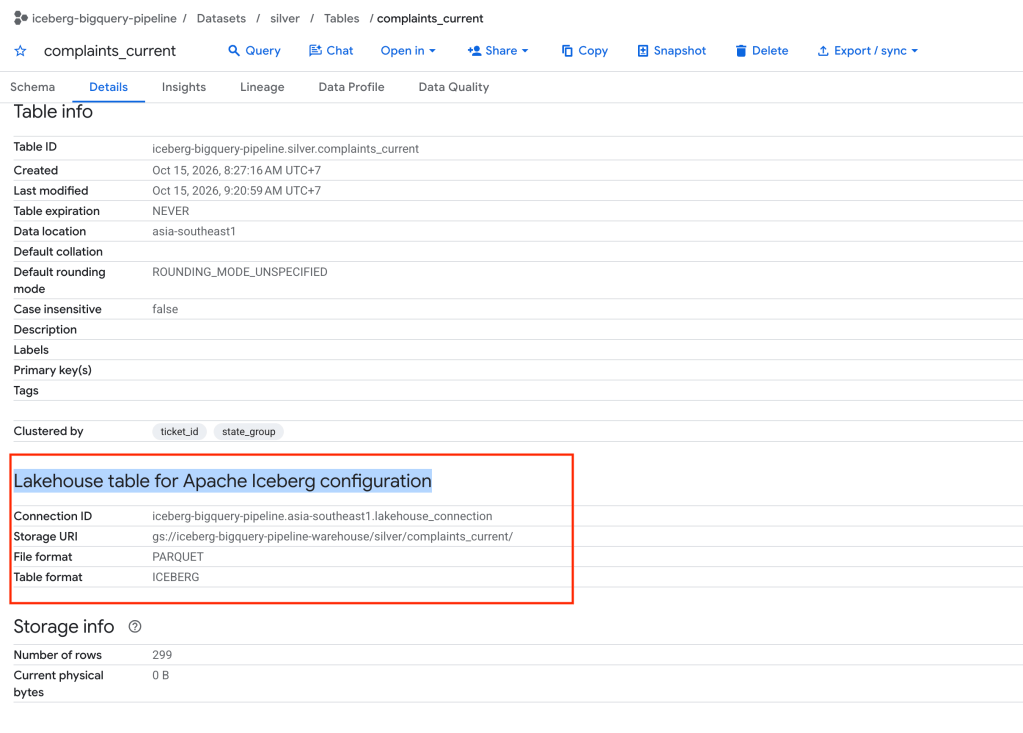
WITH CONNECTION says which connection to use. PARQUET is how the data files are stored. ICEBERG is the table format. storage_uri tells BigQuery where to keep this table’s files. Each table gets its own empty storage path when first created. See Google’s managed Iceberg guide for the service details.
Make local SQL files with your config’s names filled in:
mkdir -p work/sqlcomplaint-pipeline render-sql --config config/local.json --name bootstrap > work/sql/01_tables.sqlcomplaint-pipeline render-sql --config config/local.json --name normalize > work/sql/02_normalize.sqlcomplaint-pipeline render-sql --config config/local.json --name publish > work/sql/03_publish.sql
These commands only prepare text files. They don’t create tables or process data. Open the files and check the project and bucket names, then run the first file:
bq --project_id="$TUTORIAL_PROJECT" --location="$TUTORIAL_REGION" query \ --use_legacy_sql=false < work/sql/01_tables.sql
Quick check: open the datasets in BigQuery. You should see staging.raw_pages, staging.complaint_rows, the staging.rejected_rows view, two Silver tables, three Gold tables and ops.published_runs. The Silver and Gold tables use Iceberg.
4. Ask the API for a small sample
An API is a way for our program to request data from another service. This API returns JSON: text containing named values and lists. Its results list contains the complaints.
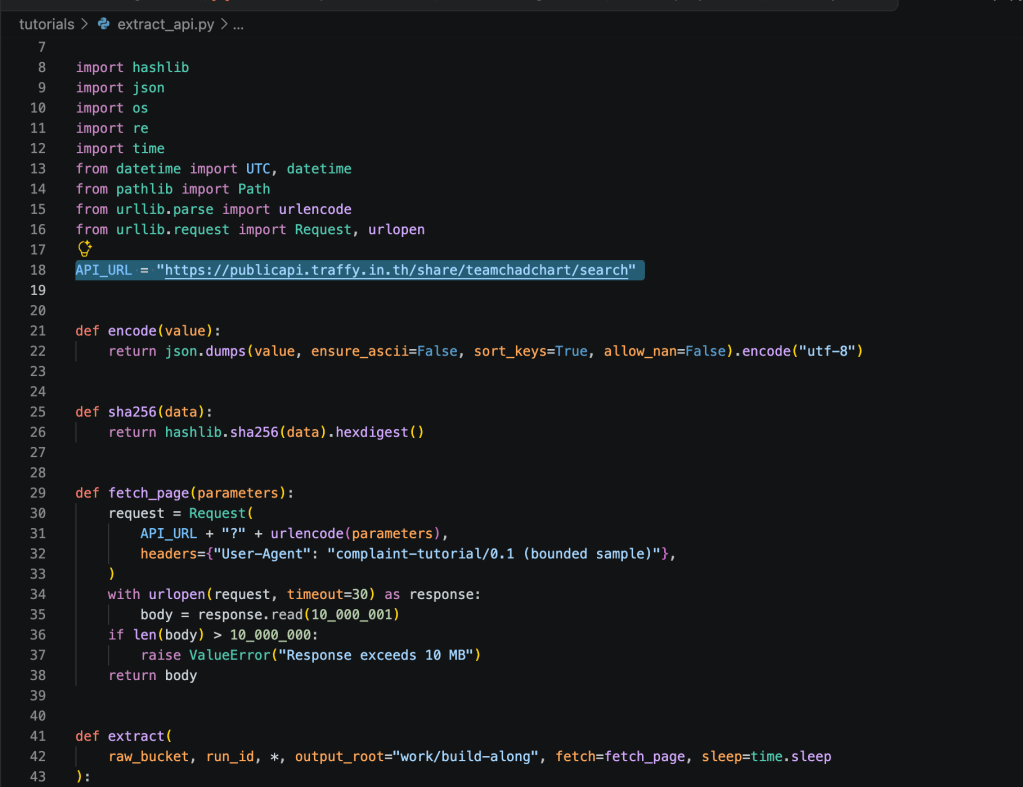
Open tutorials/extract_api.py. Find fetch_page and the loop over offset. These lines show the main idea:
# Excerpt from the extractor; the complete file includes the imports and checks.parameters = {"limit": 100, "offset": offset}raw = fetch_page(parameters)payload = json.loads(raw)records = payload["results"]
limit=100 asks for up to 100 records. The offsets 0, 100 and 200 ask for the first, second and third pages. If a page is short, the script stops early. It waits between requests and saves the original response text without cleaning complaint fields.
Run the complete script:
python tutorials/extract_api.py
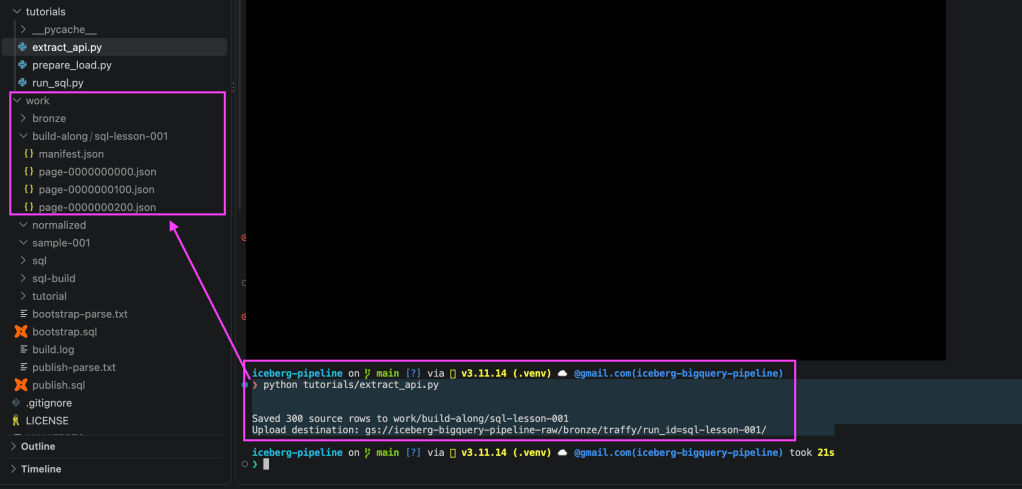
Look inside work/build-along/friendly-001/. You’ll find page files and manifest.json. The manifest is our packing list: which files belong to this collection, how many records they contain, and a fingerprint for each file. Those fingerprints let us check later that a file hasn’t changed.
Upload the page files first, then the packing list:
gcloud storage cp --no-clobber "work/build-along/${TUTORIAL_RUN_ID}"/page-*.json \ "gs://${TUTORIAL_RAW_BUCKET}/bronze/traffy/run_id=${TUTORIAL_RUN_ID}/"gcloud storage cp --no-clobber "work/build-along/${TUTORIAL_RUN_ID}/manifest.json" \ "gs://${TUTORIAL_RAW_BUCKET}/bronze/traffy/run_id=${TUTORIAL_RUN_ID}/manifest.json"export TUTORIAL_MANIFEST="gs://${TUTORIAL_RAW_BUCKET}/bronze/traffy/run_id=${TUTORIAL_RUN_ID}/manifest.json"

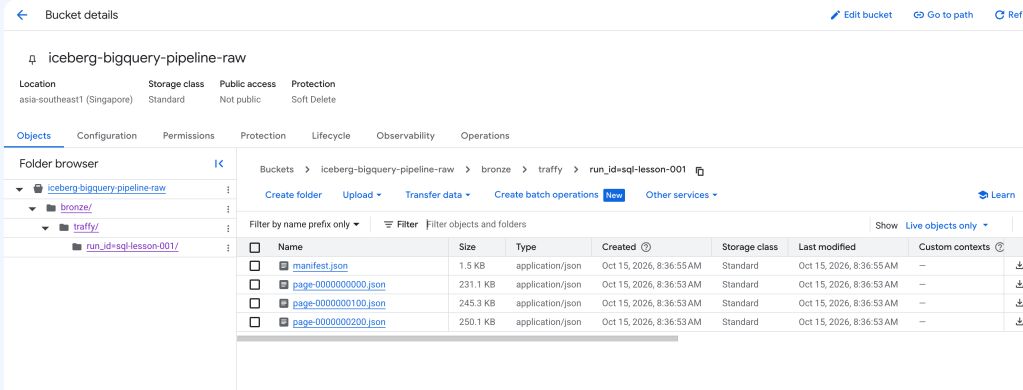
Uploading the manifest last says “this collection is ready.” Use a new run ID for a new collection; don’t overwrite an earlier one. If extraction failed partway through, the teaching script also needs a new run ID to start again.
Quick check: open the local manifest. record_count should be at most 300. A successful empty response is possible, but an empty collection won’t pass the later publish checks. Because the API can change between requests, this sample may miss or repeat complaints.
5. Bring the original responses into BigQuery
We have files now. Next we want SQL to read them.
BigQuery’s JSON loader expects one table row per line. Our preparation script puts each whole API response on one line, along with its collection details. This format is called NDJSON, or newline-delimited JSON. It checks the file fingerprints first.
Open tutorials/prepare_load.py and its prepare_load helper to see how that happens, then run:
python tutorials/prepare_load.pyexport TUTORIAL_LOAD_URI="gs://${TUTORIAL_RAW_BUCKET}/loads/${TUTORIAL_PROCESSING_ID}.jsonl"gcloud storage cp --no-clobber "work/build-along/${TUTORIAL_PROCESSING_ID}.jsonl" "$TUTORIAL_LOAD_URI"bq --project_id="$TUTORIAL_PROJECT" --location="$TUTORIAL_REGION" load \ --source_format=NEWLINE_DELIMITED_JSON --max_bad_records=0 \ "${TUTORIAL_PROJECT}:staging.raw_pages" "$TUTORIAL_LOAD_URI"
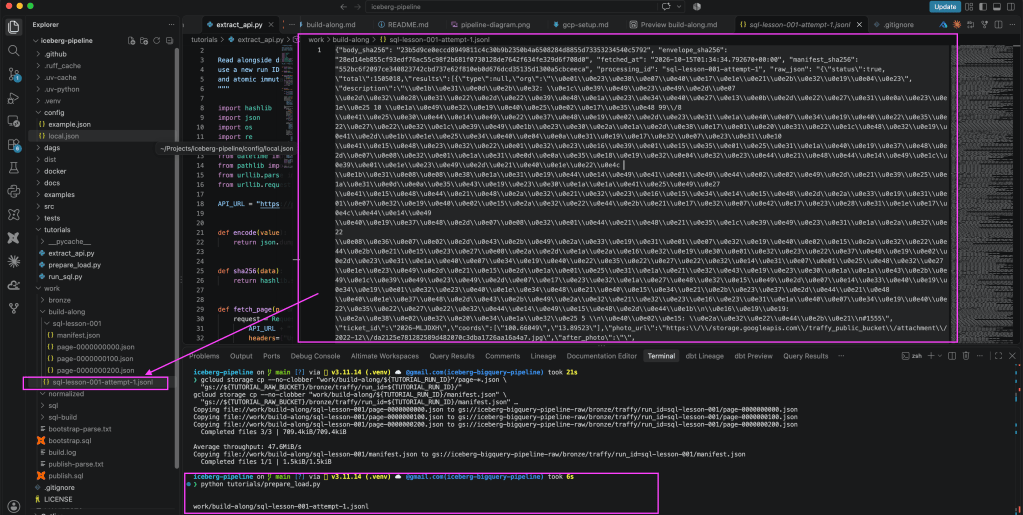

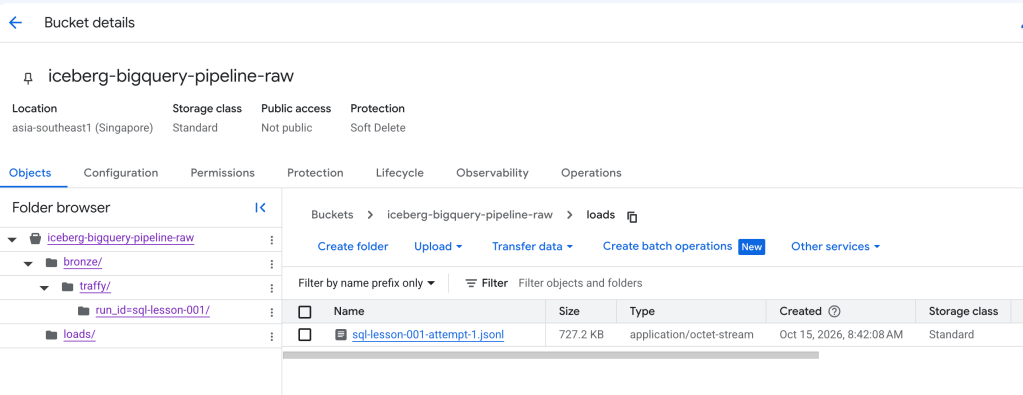
Wait for the load to finish successfully. At this point, one row means one API page. Three full pages mean three rows containing 300 complaints. The next step will separate those complaints into individual rows. The original response text now exists in both Cloud Storage and BigQuery staging.
Open the BigQuery SQL editor and run this check. For every SQL editor example in this guide, replace project_name yourself. Also change the two labels if you chose different run and processing IDs. The editor doesn’t know your terminal variables.
SELECT source_uri, record_countFROM `project_name.staging.raw_pages`WHERE run_id = 'friendly-001' AND processing_id = 'friendly-001-attempt-1';
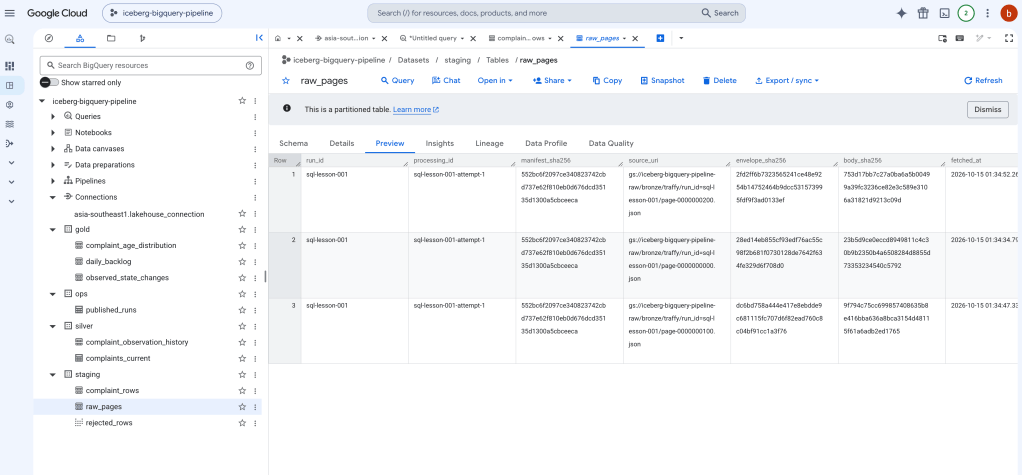
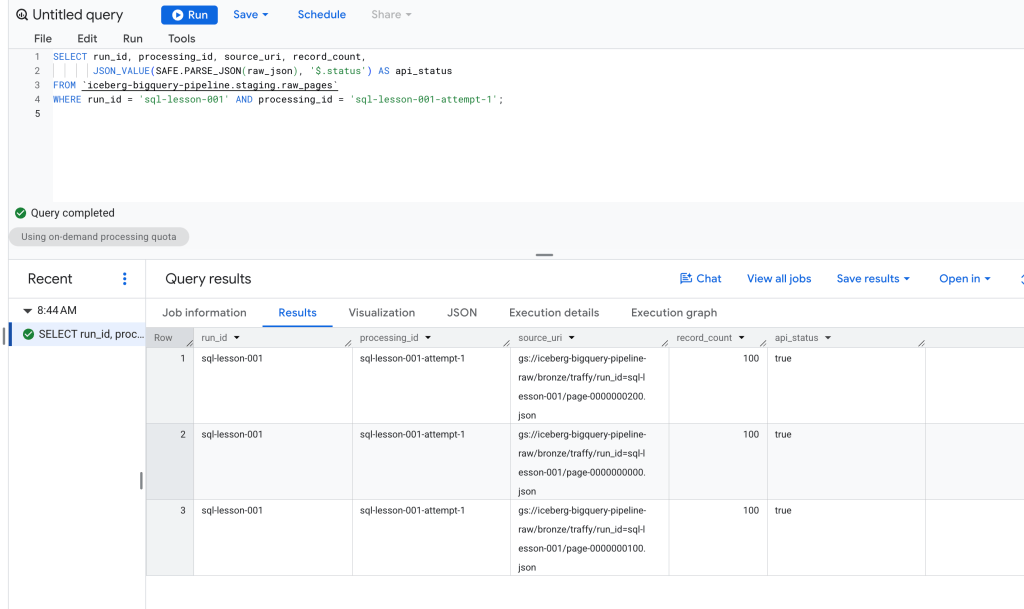
Quick check: on your first load, you should see one row for each page in the manifest. The page counts should add up to the manifest’s record_count.
6. Let SQL turn responses into useful records
Now we’re at the main part of the project. Python collected and loaded the responses. BigQuery SQL does the cleaning.
Start with this small query in the BigQuery editor:
SELECT JSON_VALUE(record, '$.ticket_id') AS ticket_id, JSON_VALUE(record, '$.timestamp') AS original_timestampFROM `project_name.staging.raw_pages` AS p,UNNEST(JSON_QUERY_ARRAY(SAFE.PARSE_JSON(p.raw_json), '$.results')) AS recordWHERE p.run_id = 'friendly-001' AND p.processing_id = 'friendly-001-attempt-1';
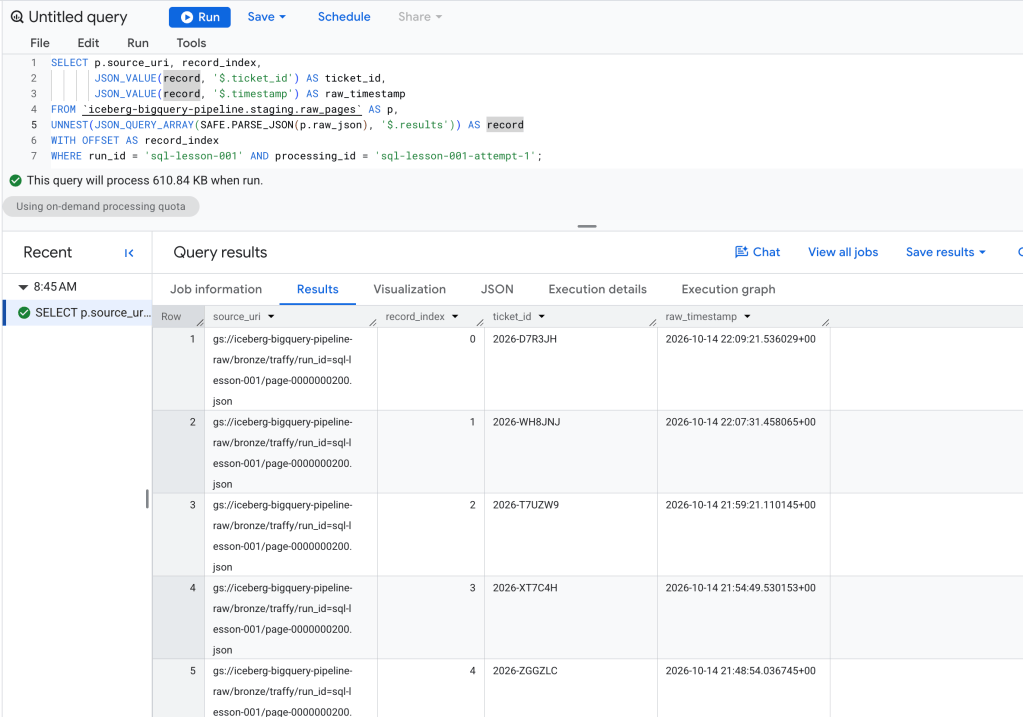
Read it from the inside out. SAFE.PARSE_JSON reads the response text as JSON. JSON_QUERY_ARRAY gets its results list. UNNEST opens that list into separate rows. JSON_VALUE picks a field from each complaint. We now have a row per complaint, although this little query hasn’t cleaned or saved anything yet.
Open the full cleaning SQL. It also checks pages, trims text, reads dates and coordinates, groups statuses, and marks records that have problems. Normalize is the name we use for this “make values consistent and check them” step.
Run the complete file from your terminal:
python tutorials/run_sql.py \ --config config/local.json --manifest "$TUTORIAL_MANIFEST" \ --processing-id "$TUTORIAL_PROCESSING_ID" \ --stage normalize --sql work/sql/02_normalize.sql
The runner sends the SQL and its input values to BigQuery, then waits for it to finish. The input values include which collection to read and how statuses should be grouped. It also fills in placeholder table names from your config. Already-filled table names stay as written, so regenerate work/sql/ if you change your project or dataset settings.
Back in the BigQuery editor, check the results:
SELECT is_valid, COUNT(*) AS recordsFROM `project_name.staging.complaint_rows`WHERE run_id = 'friendly-001' AND processing_id = 'friendly-001-attempt-1'GROUP BY is_valid;SELECT ticket_id, rejection_reasonsFROM `project_name.staging.rejected_rows`WHERE run_id = 'friendly-001' AND processing_id = 'friendly-001-attempt-1';
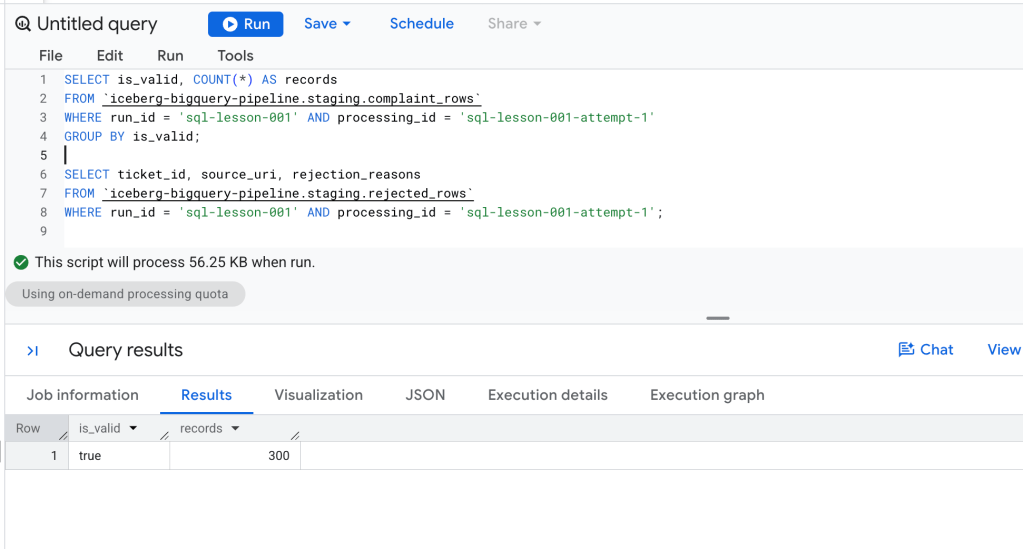
is_valid = true means a record passed our checks. Rejected records stay available with an explanation, such as a missing required value. An unfamiliar status becomes unknown; we don’t assume it means the complaint is closed.
Quick check: accepted records plus rejected records should equal the manifest’s total. If you want to change the cleaning rules later, edit src/complaint_pipeline/sql/normalize.sql and regenerate the SQL files. That keeps the code’s record of the rules in sync.
7. Save the clean data and build summaries
We’ve checked the records. Now we can publish them: save the accepted results into the Silver and Gold tables.
Open the publishing SQL. It checks the counts and stops if more than 5% of the input records are rejected, using the default config. Then it Deduplicates: if a ticket appears more than once in this collection, it keeps the newest source version.
Here’s what the result tables tell us:
| Table | What it tells us |
|---|---|
silver.complaints_current | The latest known details for each complaint we’ve collected |
silver.complaint_observation_history | What we saw for each complaint on each collection |
gold.daily_backlog | Counts by organization and status in this sample |
gold.complaint_age_distribution | How old the open complaints in this sample are |
gold.observed_state_changes | Status or reopen-count changes between our observations |
ops.published_runs | Which collections were published successfull |
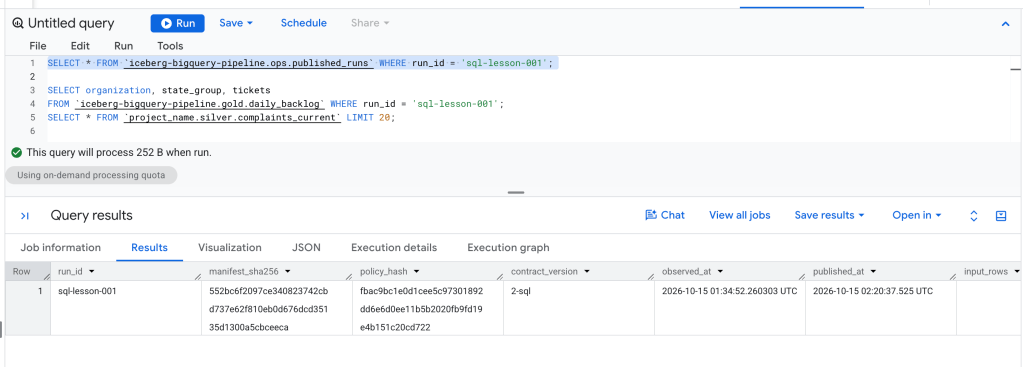
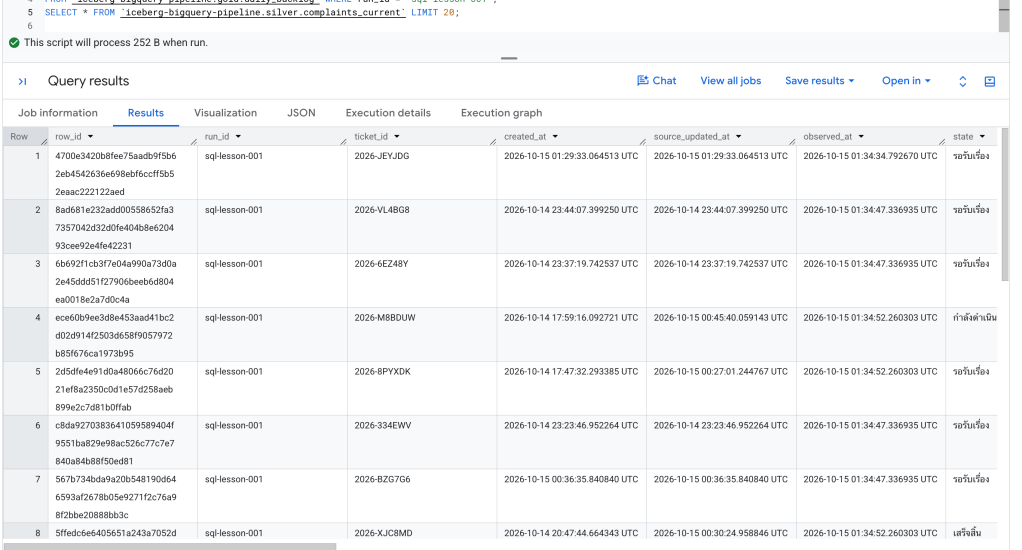
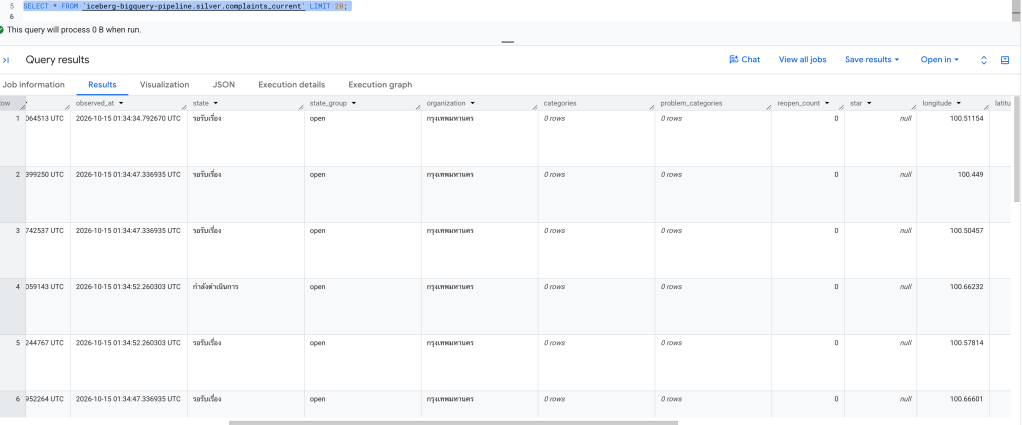
Run the publish step:
python tutorials/run_sql.py \ --config config/local.json --manifest "$TUTORIAL_MANIFEST" \ --processing-id "$TUTORIAL_PROCESSING_ID" \ --stage publish --sql work/sql/03_publish.sql
Silver, Gold and the completed-run record are saved together in a transaction. That means all those changes succeed together, or none are saved. The staging records remain available if publication fails, so you can investigate what happened.
Let’s ask a useful question in the BigQuery editor: how many sampled complaints were open for each organization?
SELECT organization, ticketsFROM `project_name.gold.daily_backlog`WHERE run_id = 'friendly-001' AND state_group = 'open'ORDER BY tickets DESC;SELECT run_id, input_rows, accepted_rows, rejected_rows, distinct_ticketsFROM `project_name.ops.published_runs`WHERE run_id = 'friendly-001';
Quick check: there should be one completed-run record. Try the same publish command again after it finishes. The saved record acts like a receipt, so the same collection and rules won’t be published twice. Run publishers one at a time, including manual runs.
The summaries are about this sample. Don’t add several runs together and call the result unique complaints: the same complaint can appear in multiple collections. A change table also shows changes we observed, not every change that happened between our visits.
8. Let Cloud Composer run the steps for us
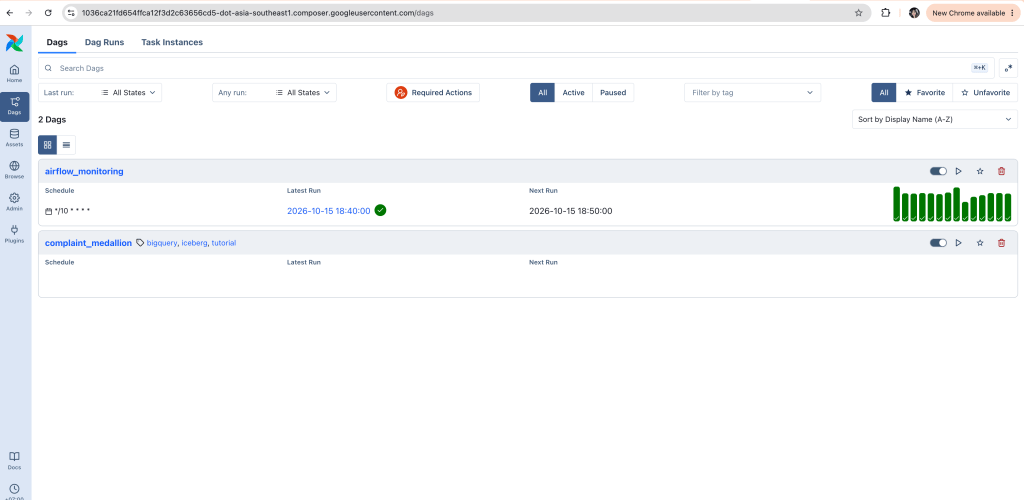
You now have a working manual pipeline. Composer will run the same sequence for a new collection. It uses Airflow, which represents the steps and their order in a DAG. For this project, that just means:
extract → load_raw → normalize_sql → publish_sql
Create Composer when you’re ready for this part: the environment has ongoing costs even between pipeline runs. The manual lessons work without it.
Create the account for the pipeline
Run these commands once, or reuse the account if you already created it:
gcloud iam service-accounts create composer-complaintsexport TUTORIAL_COMPOSER_SA="composer-complaints@${TUTORIAL_PROJECT}.iam.gserviceaccount.com"gcloud projects add-iam-policy-binding "$TUTORIAL_PROJECT" \ --member="serviceAccount:${TUTORIAL_COMPOSER_SA}" --role=roles/composer.workergcloud projects add-iam-policy-binding "$TUTORIAL_PROJECT" \ --member="serviceAccount:${TUTORIAL_COMPOSER_SA}" --role=roles/bigquery.jobUsergcloud storage buckets add-iam-policy-binding "gs://${TUTORIAL_RAW_BUCKET}" \ --member="serviceAccount:${TUTORIAL_COMPOSER_SA}" --role=roles/storage.objectUser
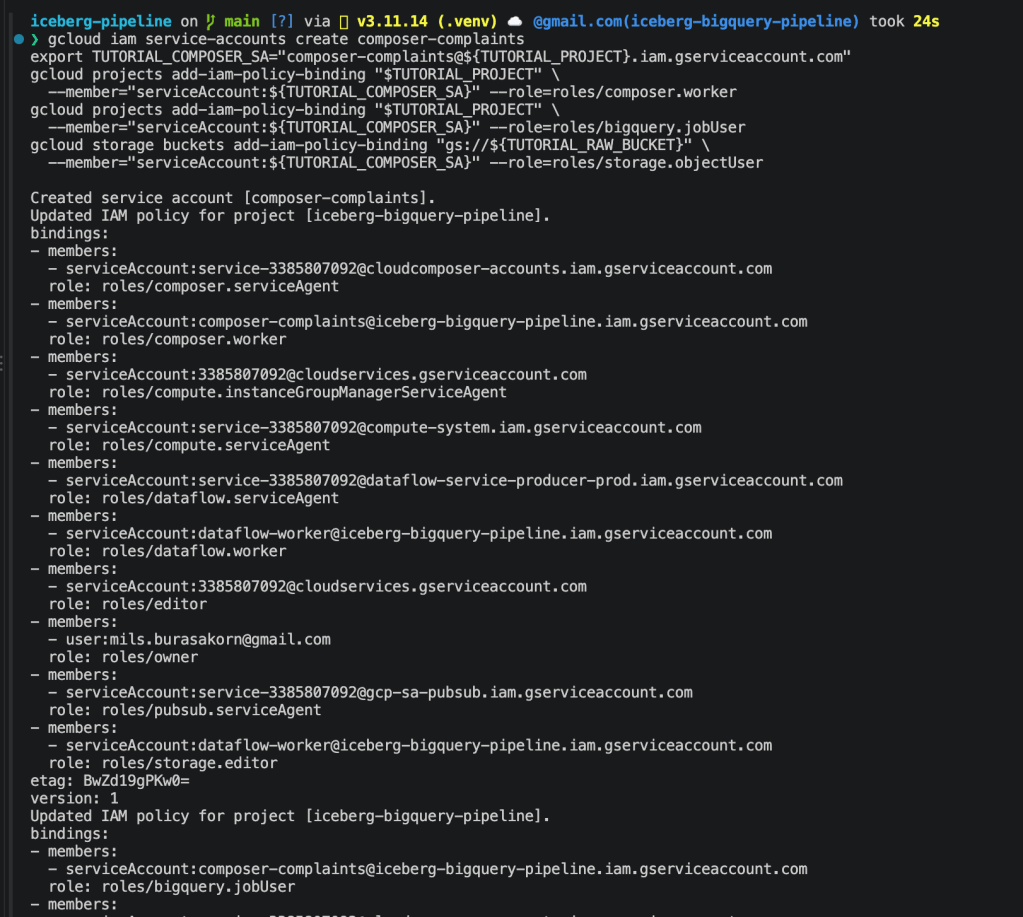
In BigQuery, open each dataset (staging, silver, gold, ops), go to its sharing permissions, and grant this account BigQuery Data Editor. This lets the pipeline read and update the tables. The connection account from step 2 still manages the Iceberg files.
Create the environment
export TUTORIAL_COMPOSER_IMAGE="SUPPORTED_COMPOSER_3_AIRFLOW_2_IMAGE_FROM_LIST"
export TUTORIAL_COMPOSER_ENV="complaint-tutorial"
gcloud composer environments create "$TUTORIAL_COMPOSER_ENV" \
  --location="$TUTORIAL_REGION" \
  --image-version="$TUTORIAL_COMPOSER_IMAGE" \
  --service-account="$TUTORIAL_COMPOSER_SA"
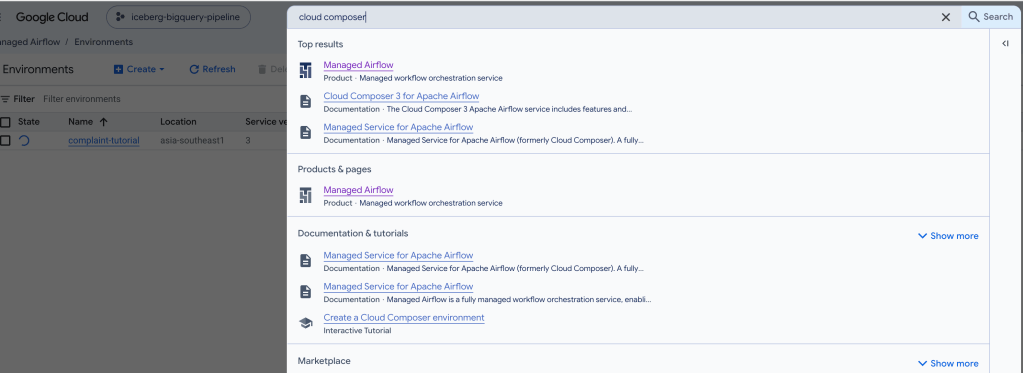
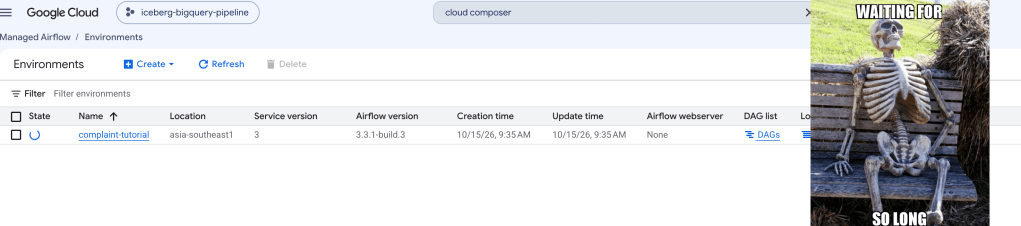
This tutorial will use composer-3-airflow-3.3.1-build.3 as the latest release date on September 25, 2026
export TUTORIAL_COMPOSER_IMAGE="composer-3-airflow-3.3.1-build.3"
export TUTORIAL_COMPOSER_ENV="complaint-tutorial"
gcloud composer environments create "$TUTORIAL_COMPOSER_ENV" \
  --location="$TUTORIAL_REGION" \
  --image-version="$TUTORIAL_COMPOSER_IMAGE" \
  --service-account="$TUTORIAL_COMPOSER_SA"
Name the environment complaint-tutorial and wait until it is ready.
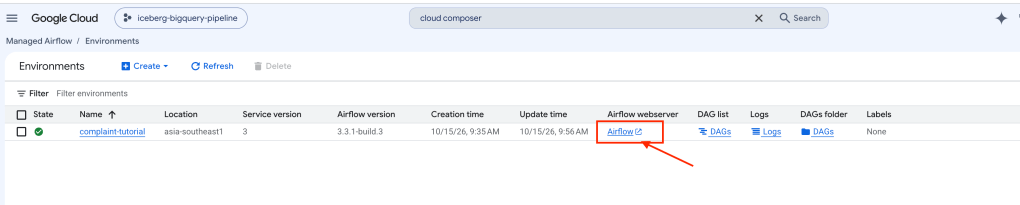
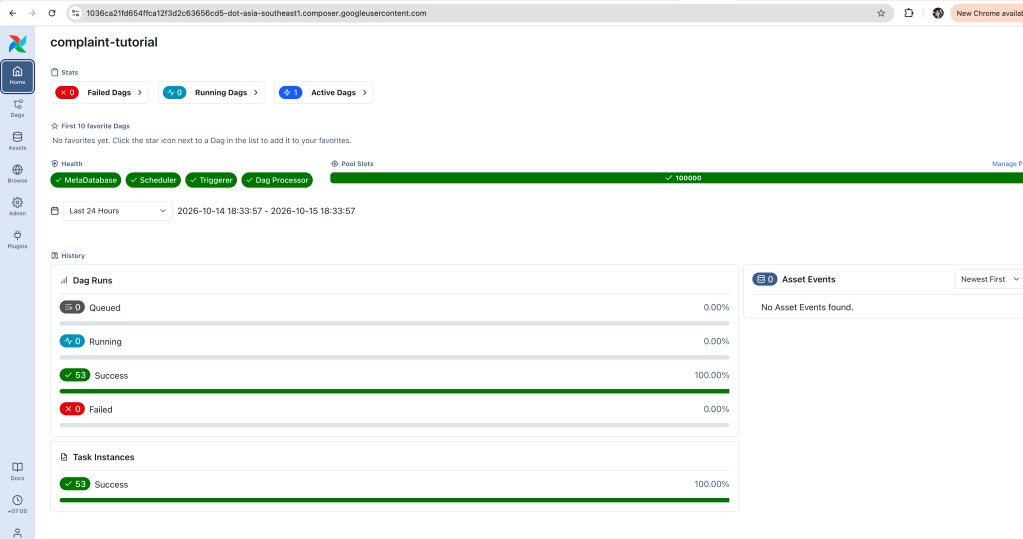
Upload the code and give it the settings
Back in your terminal:
export TUTORIAL_COMPOSER_ENV="complaint-tutorial"export TUTORIAL_DAG_PREFIX="$(gcloud composer environments describe "$TUTORIAL_COMPOSER_ENV" \ --location="$TUTORIAL_REGION" --format='value(config.dagGcsPrefix)')"gcloud storage cp --recursive src/complaint_pipeline "$TUTORIAL_DAG_PREFIX/"gcloud storage cp dags/complaint_medallion.py "$TUTORIAL_DAG_PREFIX/"
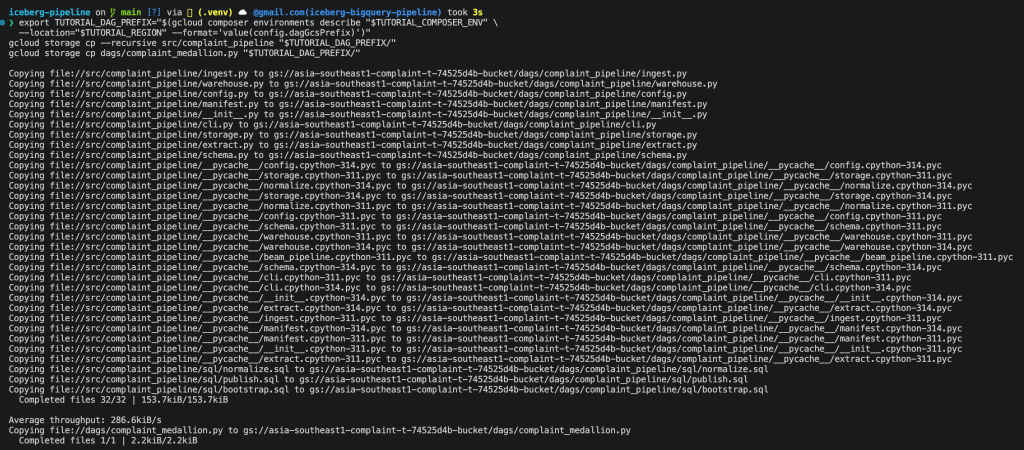
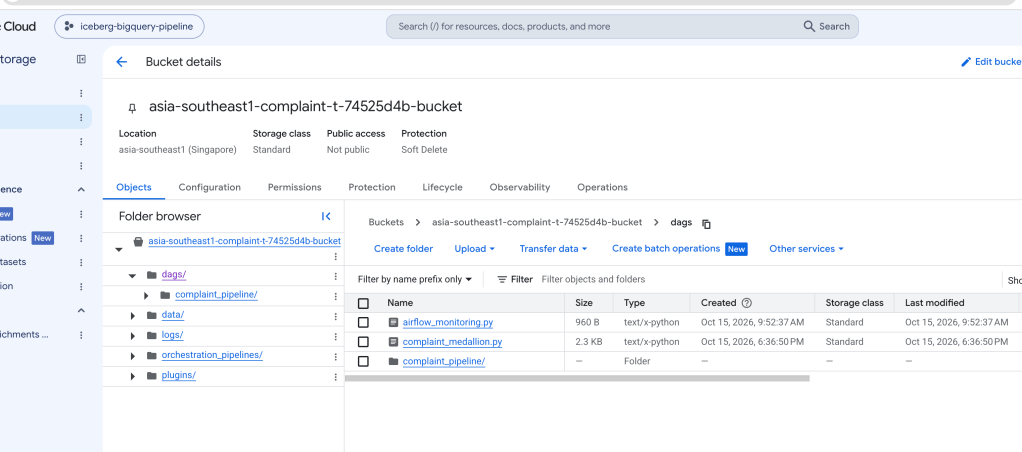
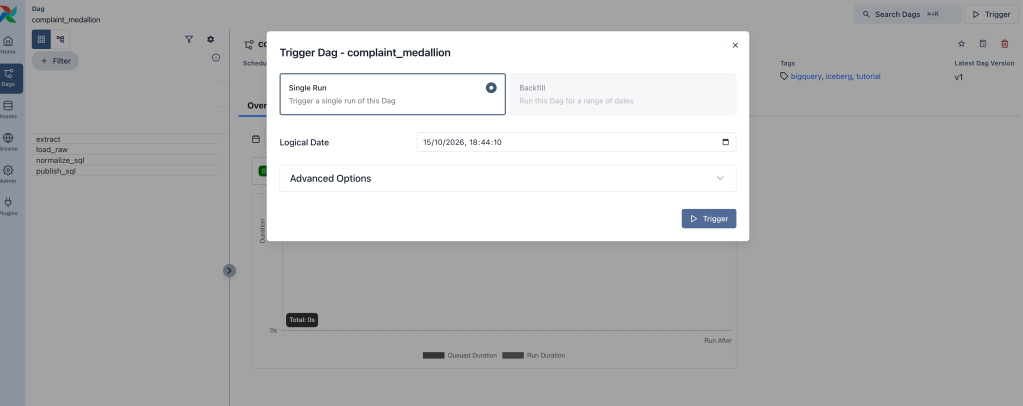
The first upload includes the Python package and its SQL files. The second adds the instructions that tell Airflow what order to run things in.
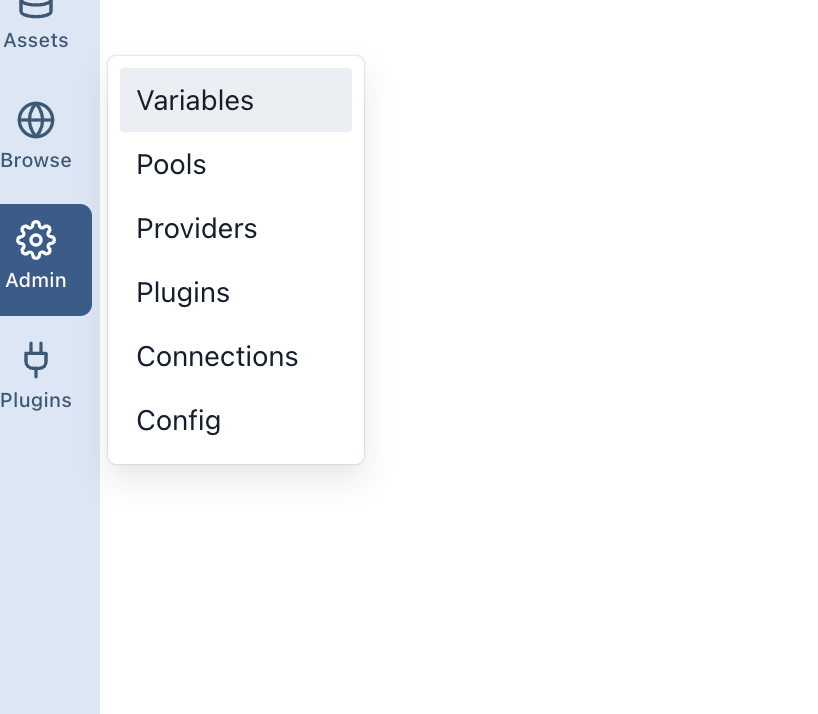
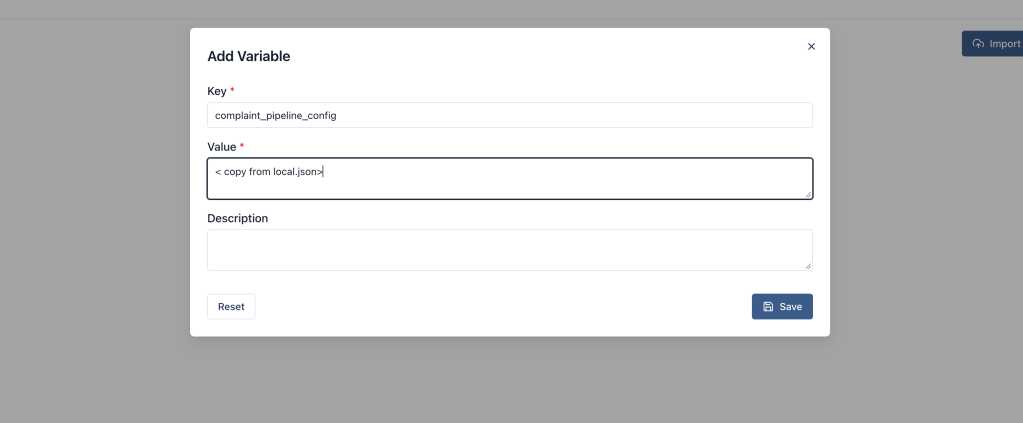
Open the environment’s Airflow UI. Under Admin → Variables, add a variable named complaint_pipeline_config. Paste the full JSON content of config/local.json as its value. The tasks read these settings when they run.
Find the complaint_medallion DAG, unpause it if needed, and trigger one run. Open the graph and watch each step finish before the next starts. If a step fails, open its log; that’s where the error message and BigQuery job details appear.
This run collects fresh data and uses generated IDs, so it won’t be called friendly-001. The DAG starts with no automatic schedule and permits one active run at a time. You can choose a schedule later after checking the API’s access limits.
Quick check: in the BigQuery editor, find the new completed-run record:
SELECT run_id, published_at, input_rows, distinct_ticketsFROM `project_name.ops.published_runs`ORDER BY published_at DESCLIMIT 5;
If something gets stuck
It’s easier to fix one step while you still know what went into it. Stop at the first failed command, read the error, and use the matching starting point below.
| What you see | What to check first |
|---|---|
project_name appears in an error | Check config/local.json, regenerate work/sql/, and replace placeholders manually in SQL editor examples. |
Unrecognized name: raw_pages in older SQL | Regenerate work/sql/02_normalize.sql from the current repository. The full-row check uses the explicit raw_page alias. |
| A variable is missing in Python | Run the export commands in the same terminal as the script. |
| Extraction says the folder already exists | Choose a new run ID and processing ID for a fresh capture. |
Load preparation says the .jsonl file exists | Reuse that file if preparation already succeeded. For a new attempt, choose a new processing ID and repeat preparation and loading. |
| Access denied | Check which identity failed: your login, Composer’s account or the connection account. |
| A file fingerprint doesn’t match | Check that the manifest and pages belong to the same capture; don’t edit original capture files. |
| Publish fails its quality check | Read staging.rejected_rows for this attempt and investigate the reasons before changing any threshold. |
| Composer cannot import the DAG | Check its Airflow version, Python dependencies, package upload and SQL directory. |
After a successful normalization, you can rerun it with the same IDs; it replaces that attempt’s checked rows. A manual bq load appends rows, so avoid repeating successful loads unnecessarily. The SQL can remove identical repeated pages, but it rejects conflicting copies. More explanations are in troubleshooting.
Before you leave your tutorial running
Keep the original captures if you want to revisit your work. The staging tables expire old partitions after 30 days based on the data’s timestamps, so replaying much older data needs a retention change first. Let BigQuery manage the Iceberg files; don’t delete files inside the warehouse table folders yourself.
If you’re finished experimenting, delete the unused Composer environment through Google Cloud and review the other resources you created. This repository doesn’t clean up cloud resources automatically.
For your next experiment, collect a fresh sample with new IDs and compare the observations. Start with one ticket you saw twice: did its details change, and what did the history table keep? That’s a useful way to see why we saved both the latest details and earlier visits.


Leave a Reply